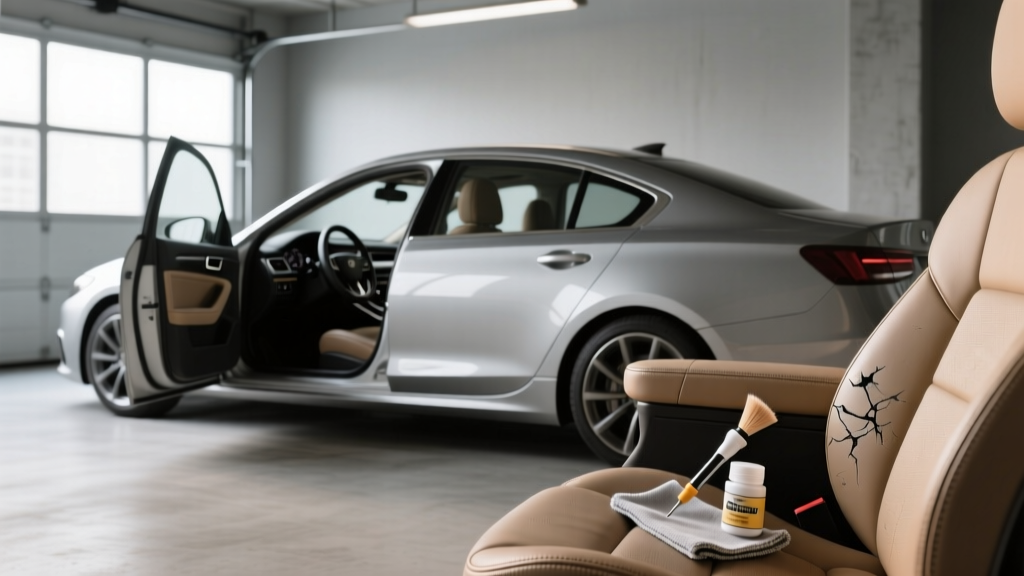
Scratch Repair Methods for Your Vehicle (2026)
Scratches are one of those car problems that feel small?until you notice them every time you walk up to your vehicle. A light scuff on a door panel, a scrape on a bumper corner, or a mystery mark across a glossy interior trim piece can instantly make an otherwise clean car feel ?tired.? The good news: many scratches can be improved (or fully repaired) at home with the right method, tools, and expectations.
The tricky part is choosing the right scratch repair approach. Using the wrong product or technique can turn a quick fix into a bigger repair?think hazy clear coat, mismatched paint, or a shiny ?spot? on matte interior plastic. This guide breaks down how to assess scratches, match them to the right repair method, and avoid the most common mistakes, whether you?re dealing with exterior paint, wheels, glass, or interior surfaces.
If you want results that look professional, the process starts with diagnosis. Once you know what you?re actually looking at (clear coat scuff vs. base-coat scratch vs. gouge into plastic), the correct repair method becomes a lot more obvious.
Step 1: Identify Where the Scratch Is (Exterior vs. Interior)
Exterior scratch locations (most common)
- Clear coat / paint (doors, hood, trunk, bumpers)
- Plastic trim (textured bumper cladding, mirror caps)
- Wheels (curb rash on painted or machined rims)
- Glass (fine wiper marks, side window scratches)
- Headlights (hazing/scratches in polycarbonate lens)
Interior scratch locations (often overlooked)
- Soft-touch plastics (center console, door pulls)
- Gloss piano-black trim (highly scratch-prone)
- Leather or vinyl (seat bolsters, armrests)
- Instrument cluster lens (clear plastic over gauges)
Quick tip: If the scratch is on a high-touch interior surface, prioritize a repair that matches the original sheen (matte, satin, or gloss). A perfectly ?filled? scratch that leaves a shiny patch can look worse than the scratch itself.
Step 2: Diagnose the Scratch Depth (The Most Important Decision)
Your repair method depends less on where the scratch is and more on how deep it goes.
Use these simple tests
- Fingernail test: Lightly drag a clean fingernail across the scratch.
- If your nail doesn?t catch, it?s usually a surface scuff or light clear coat scratch.
- If your nail catches, it?s deeper?possibly through the clear coat or into the base coat.
- Water/alcohol wipe test: Wipe the area with a damp microfiber or a 10?20% isopropyl alcohol mix.
- If the scratch disappears when wet and returns when dry, it?s likely in the clear coat and can often be polished.
- If it stays visible wet or dry, it may be deeper or a color transfer.
- Color check:
- White marks on darker paint are often clear coat scuffs or transfer (not always missing paint).
- If you see primer (gray) or metal, you?re beyond polishing?touch-up or refinishing is needed.
Choosing the Right Method: A Practical Scratch Repair Decision Guide
1) Clear coat scuffs and light scratches (best DIY results)
Best methods: paint-safe polish, compound (if needed), microfiber pads, dual-action polisher (optional).
When to choose this: scratch doesn?t catch a fingernail, improves when wet.
Step-by-step: Polish out light clear coat scratches
- Wash and decontaminate the area (car shampoo + microfiber). If the paint feels rough, use a clay bar with lubricant.
- Tape edges of nearby trim pieces (especially textured plastics that can stain white from compound).
- Start with the least aggressive option: a finishing polish on a foam pad by hand or DA polisher.
- Work small sections (about 12" x 12") using overlapping passes.
- Wipe and inspect under good lighting. Repeat if needed.
- Escalate only if required: use a light cutting compound, then refine with polish.
- Protect the finish with wax, paint sealant, or a ceramic spray to reduce future wash-marring.
Product recommendations (DIY-friendly)
- Polish/compound: Meguiar?s Ultimate Compound (more cut), Meguiar?s Ultimate Polish (refining), 3D One (versatile).
- Machine option: A dual-action polisher is safer than a rotary and delivers more consistent results.
- Protection: Turtle Wax Hybrid Solutions Ceramic Spray Coating or a quality paint sealant for easier maintenance.
Real-world example: That ?key scratch? on a door sometimes isn?t a key scratch at all?it can be paint transfer from a bag zipper or another car?s door edge. A wash + clay + light compound often removes it completely.
2) Scratches through clear coat into color (touch-up territory)
Best methods: touch-up paint pen/bottle, fine brushes, blending solution, clear coat touch-up (if needed).
When to choose this: your fingernail catches; you can see a darker line or exposed primer.
Step-by-step: Touch-up paint for deeper scratches
- Find your paint code (door jamb sticker, owner?s manual, or manufacturer database). Order matching touch-up paint.
- Clean and prep the scratch with isopropyl alcohol to remove wax and oils.
- Feather any sharp edges very lightly with 2000?3000 grit wet sandpaper only if there?s raised paint around the scratch (optional; advanced).
- Apply paint in thin layers using a fine brush or toothpick. Aim to fill the scratch, not paint the panel.
- Let it cure as directed (often 24?48 hours per system).
- Add clear coat if your system requires it or if the scratch is large enough to need gloss/UV protection.
- Level and polish after full cure (advanced). Use very fine wet sanding and polish to blend.
Touch-up product options
- Paint pen vs. bottle: Pens are convenient but can blob; bottles with a fine brush often look better.
- OEM vs. aftermarket: OEM touch-up matches well, but high-quality aftermarket suppliers can be excellent if they mix by code.
- Blending solution: Helpful for smoothing edges, but use carefully?too much can create halos.
Expectation setting: Touch-up paint can make a scratch far less noticeable from standing height. Under harsh light or close inspection, most DIY touch-ups remain visible?especially on metallics and pearls.
3) Deep gouges, peeling clear coat, or large damage (body shop or respray)
Best methods: professional repainting, spot repair, or panel refinishing.
When to choose this: exposed metal, rust starting, clear coat delamination, or damage longer than a handspan on a highly visible panel.
- If bare metal is exposed: treat it quickly to prevent rust. Even a temporary touch-up is better than leaving it open.
- If clear coat is peeling: polishing won?t fix it. The panel needs sanding and refinishing.
Interior Scratch Repair: Picking the Right Approach for Cabin Materials
1) Scratched plastic trim (matte/textured)
Textured plastics don?t ?polish out? the same way paint does. The goal is to reduce contrast, restore uniform texture, and match sheen.
Best methods
- Heat reflow (careful): on some plastics, gentle heat can reduce light scuffs.
- Plastic restorer/dye: helps blend whitened scratches on black trim.
- Interior trim paint: for larger areas where appearance matters more than originality.
Step-by-step: Improve light scuffs on interior plastics
- Clean thoroughly with an interior cleaner and a soft brush to remove embedded dirt.
- Test in an inconspicuous area first (especially with heat or dyes).
- For light marks: apply a dedicated plastic restorer and buff evenly with a microfiber.
- For deeper scratches: consider a plastic dye/trim coating or refinishing the piece with interior-safe paint.
Product suggestions
- Plastic/trim restorers: 303 Aerospace Protectant (protection), Cerakote Trim Coat (more durable exterior trim-style coating; test for interior sheen).
- Interior refinishing: SEM Color Coat (for interior plastics/vinyl; excellent for matching OEM-style finishes when prepped correctly).
2) Piano black and glossy interior trim (scratch magnet)
These pieces scratch if you look at them wrong. Avoid harsh compounds unless you can fully re-polish the entire piece evenly.
Best methods
- Plastic polish: designed for clear plastics and glossy trim.
- Paint protection film (PPF) or pre-cut interior screen/trim protectors: prevents new scratches.
Step-by-step: Reduce scratches in piano-black trim
- Dust safely with a soft detailing brush or air blower first (dry wiping causes micro-scratches).
- Use a plastic polish with a plush microfiber, light pressure, straight-line motions.
- Wipe clean and inspect under a flashlight.
- Protect with a trim-safe protective film to prevent recurrence.
3) Leather and vinyl scratches (seats, armrests, door inserts)
Leather scratches vary from surface scuffs to actual tears. Choose the method based on whether material is removed.
- Surface scuffs: leather cleaner + conditioner may reduce visibility.
- Color loss: leather/vinyl recoloring kit can restore appearance.
- Cracks/tears: filler + backing + dye, or professional repair for high-wear bolsters.
Step-by-step: Basic leather scuff improvement
- Clean with a dedicated leather cleaner and soft brush.
- Wipe dry with a microfiber towel.
- Condition lightly and let it absorb; buff excess.
- If color is missing: use a matched leather dye system rather than over-conditioning.
Special Cases: Wheels, Glass, and Headlights
Wheel scratches and curb rash
- Painted wheels: sand smooth, spot prime, paint, and clear (DIY kits exist).
- Machined wheels: DIY touch-ups rarely match the factory cut; consider a wheel repair shop.
Glass scratches
Very light wiper haze can sometimes be improved with glass polishing compounds, but deeper scratches are difficult. Over-polishing can create distortion.
- Choose DIY glass polish only for light defects.
- For deep scratches in the driver?s view: replacement is often the safest call.
Headlight lens scratches/haze
Headlight restoration is one of the best ?bang for your buck? scratch fixes?if you seal it properly afterward.
- DIY kit: sand, compound, then apply a UV sealant or clear coat.
- Skip the sealant and haze returns fast?sometimes in weeks.
Product Comparisons: What to Keep in Your Scratch Repair Kit
If you like being prepared, a small kit can cover most day-to-day scratches and scuffs.
Starter kit (good for most owners)
- pH-balanced car shampoo and microfiber wash mitt
- Quality microfiber towels (separate for paint vs. interior)
- Light polish + applicator pads
- Spot compound (optional)
- Paint sealant or ceramic spray
- Interior cleaner safe for plastics and screens
- Plastic polish (for cluster lens/piano black)
Next-level kit (for enthusiasts)
- Dual-action polisher + foam pads (cutting and finishing)
- Iron remover + clay bar/mitt
- Paint thickness gauge (advanced, helpful on used cars)
- Touch-up paint matched by code + fine brushes
- Trim coating/protective films for high-scratch interior areas
Common Mistakes to Avoid (That Make Scratches Worse)
- Skipping the wash step: Polishing dirt grinds contamination into the surface, creating more scratches.
- Going too aggressive too early: Start with the least abrasive method; you can always step up.
- Overheating paint or plastic: Too much pressure or speed can haze clear coat and deform interior plastics.
- Using household cleaners on interior gloss: Ammonia and harsh chemicals can permanently fog clear plastics and screens.
- Not protecting after correction: A corrected surface without protection will re-scratch more easily during washing.
- Expecting touch-up paint to look like a respray: DIY touch-up is about improvement, not invisibility.
FAQ: Scratch Repair Methods for Cars
1) Can toothpaste really remove car scratches?
Toothpaste has mild abrasives and may reduce extremely light marks on some surfaces, but it?s inconsistent and can leave haze. A proper automotive polish is safer and gives more predictable results.
2) How do I know if a scratch will polish out?
If your fingernail doesn?t catch and the scratch looks better when the area is wet, it?s usually within the clear coat and a good candidate for polishing.
3) What?s the difference between compound and polish?
Compound is more abrasive and removes defects faster but can leave haze that needs refining. Polish is less abrasive and is used to restore clarity and gloss after compounding?or to correct light defects on its own.
4) Is a paint pen worth it for deep scratches?
Yes, especially to prevent rust and reduce visibility. For best appearance, use thin layers and consider a bottle/brush system for more control than a pen tip.
5) How do I prevent scratches on piano-black interior trim?
Avoid dry wiping, use a soft detailing brush to remove dust, clean with a gentle microfiber and interior-safe cleaner, and consider a protective film (PPF-style) to stop new micro-scratches.
6) When should I stop DIY and call a professional?
If you see bare metal, rust, peeling clear coat, or you?re dealing with a large area on a highly visible panel (or a machined wheel face), a body shop or wheel repair specialist will usually save time and deliver a better match.
Next Steps: Choose a Method and Start Small
Start by identifying the surface and checking scratch depth with the fingernail and water wipe tests. For most light exterior scratches, a careful wash and polish will deliver the biggest improvement. For deeper marks, matched touch-up paint is the practical middle ground, while major damage and peeling clear coat are better handled by professionals. Inside the cabin, focus on gentle cleaning, sheen-matching products, and prevention?especially on piano-black trim and soft-touch plastics.
- Today?s quick win: Wash the area, test with water, and try a light polish on a small section.
- This weekend?s upgrade: Add protection (sealant/ceramic spray or interior trim film) to reduce new scratches.
- Long-term plan: Build a simple scratch repair kit so you?re not improvising when the next mark shows up.
For more practical interior care tips, trim protection ideas, and DIY detailing guides, explore the latest how-tos on carinteriormix.com.